


It’s safe to say that those of us who celebrate Easter eagerly look forward to that period where butter comes with a side of hot cross buns, unwrapping a chocolate egg before breakfast isn’t frowned upon and a four-day weekend is on the horizon.
To celebrate this magical time, we’ve put together a fun at-home project you can do to add some Easter cheer to your household. Perfect for little kids and big kids alike!
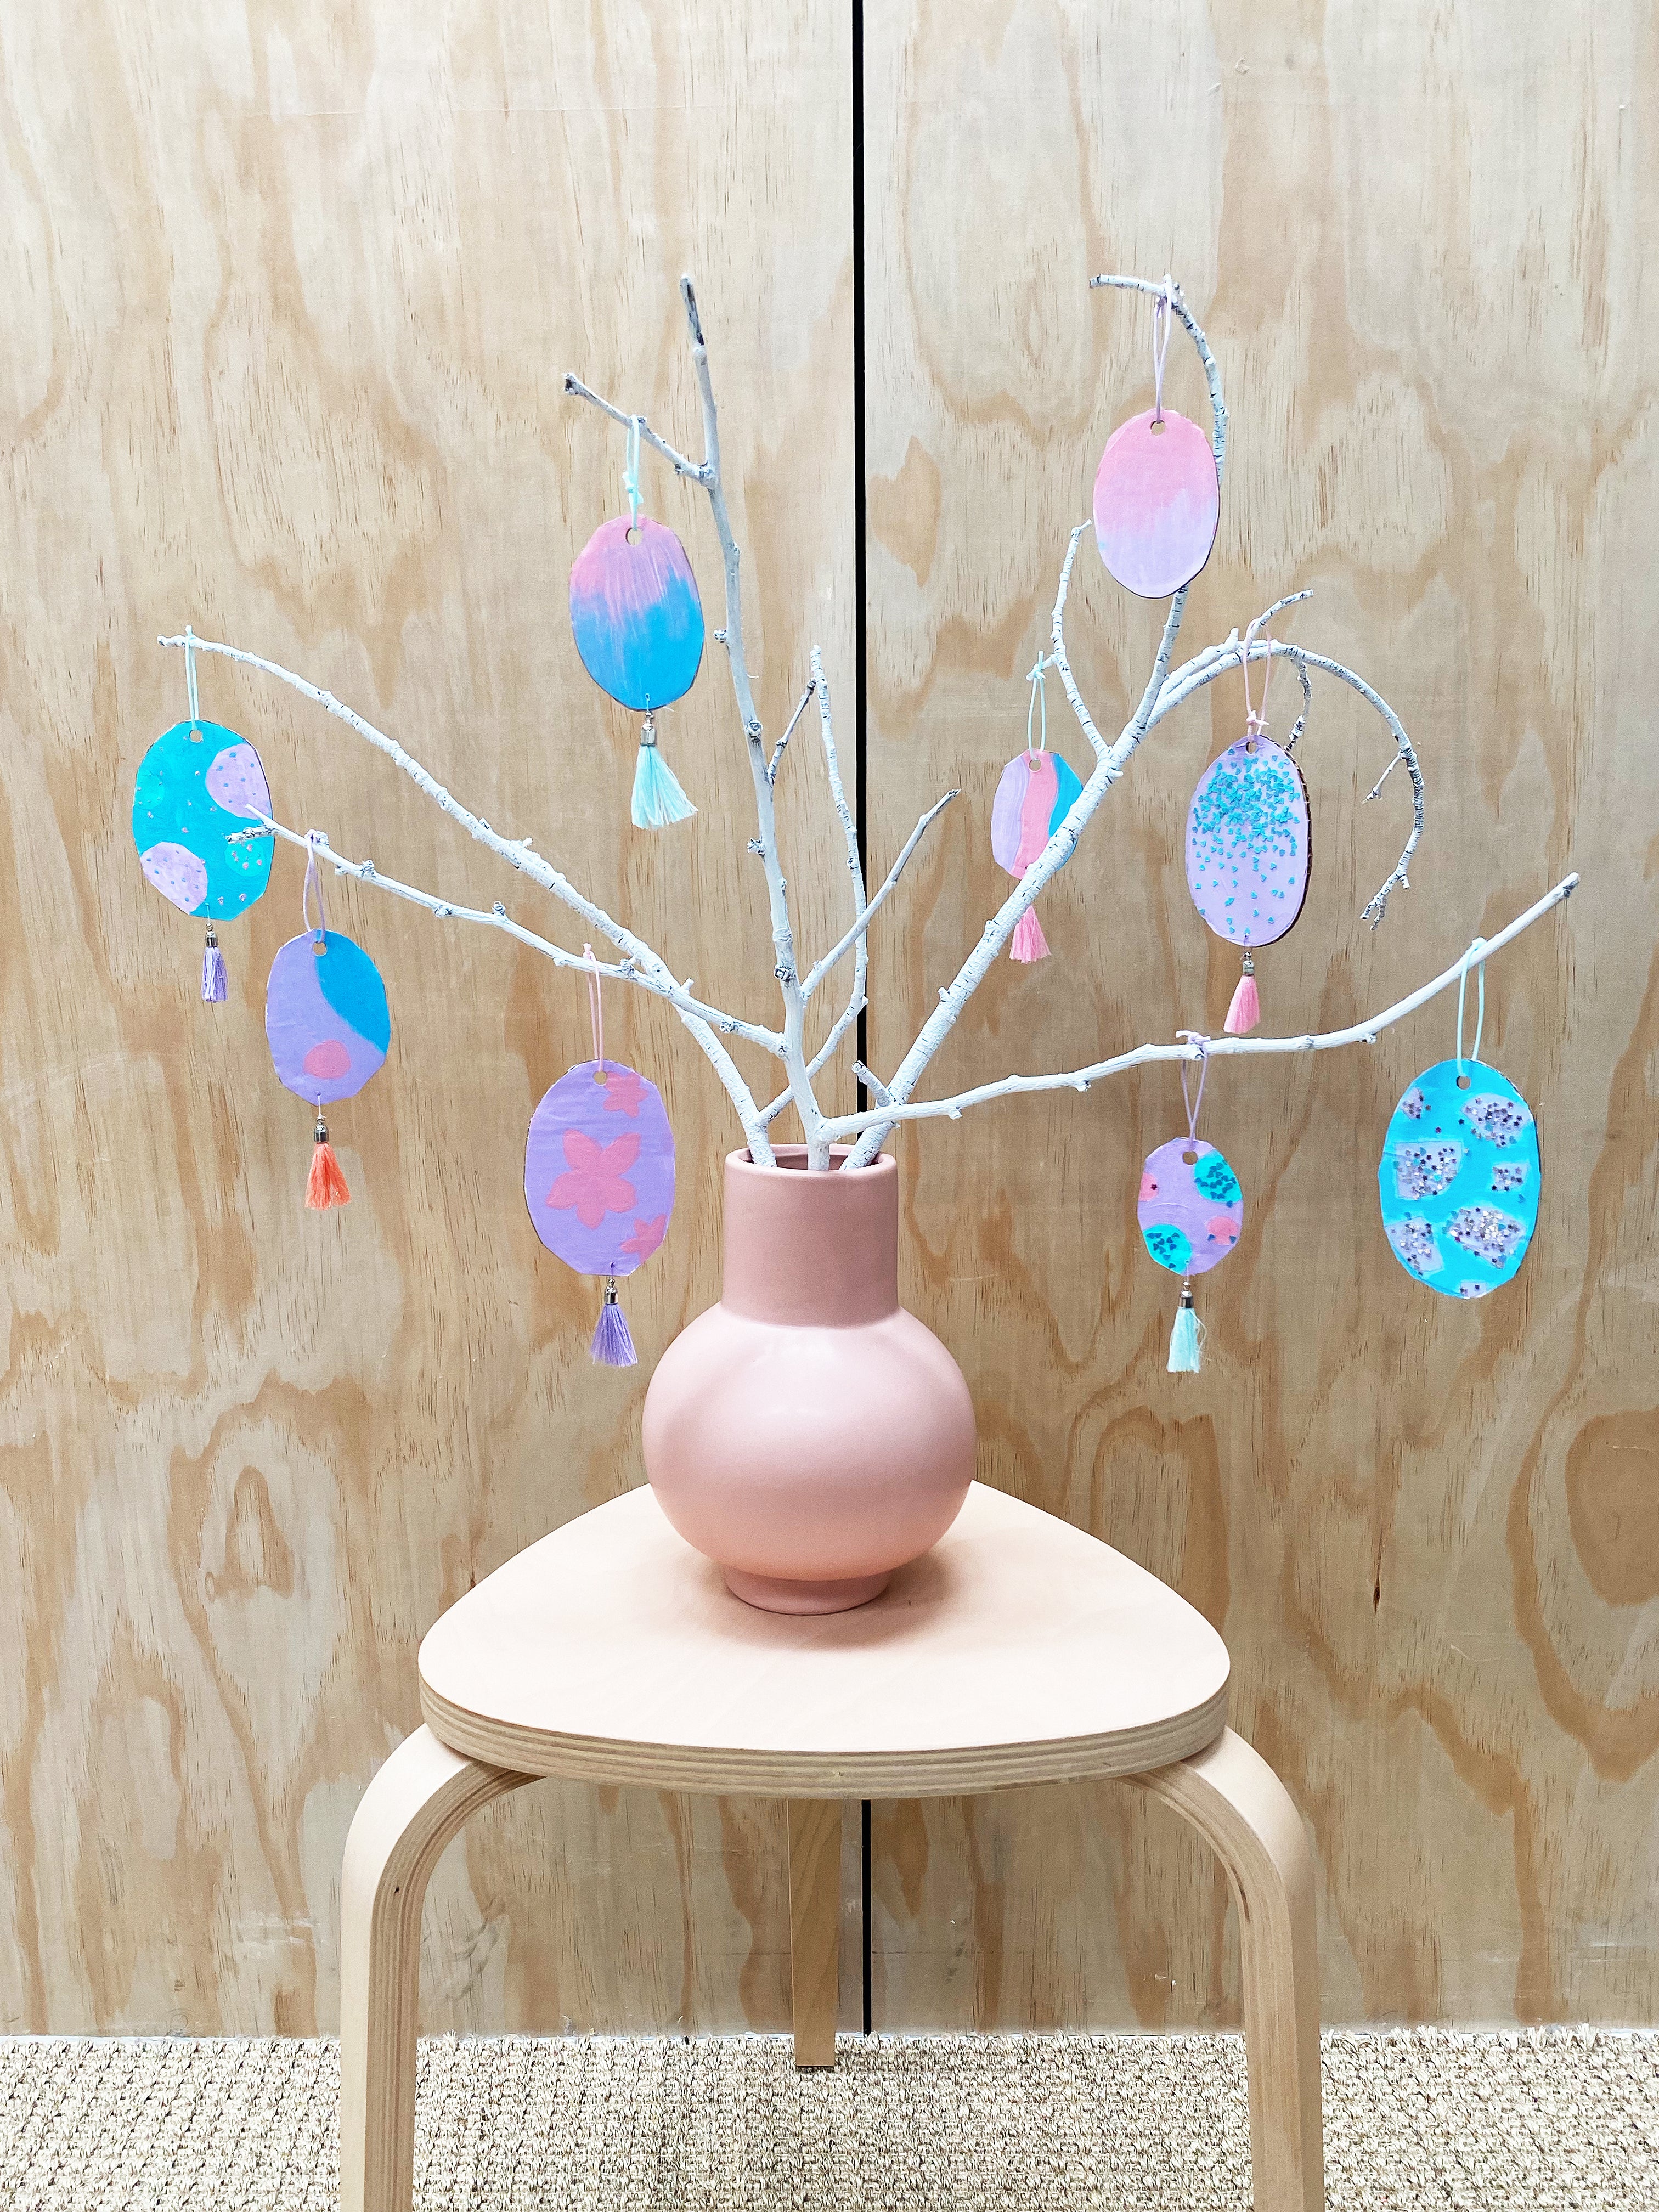
This Decorative Easter Tree is simple to put together, and most of what you need can be found at home.

What you’ll need:
Materials
- Coloured paint (We used acrylic, but you can use any paint suitable for paper. Pencils and crayons also work)
- White spray paint or acrylic paint (for your tree)
- 1x medium or large vase
- A selection of tree branches from the garden or your local park
- Cardboard
- Coloured string
- Download your Eva egg designs
- Non-essentials: Extra decorations (we chose glitter and tassels) Plus, fine thread and a needle (for tassels)
- Scissors
- Glue sticks
- Hole punch
- Paintbrushes
-
Printer
Now you’ve got everything you need, let’s make your tree!

Step 1
Arrange the branches in the vase to figure out which ones you’ll use and the desired length. Then, give the branches 1-2 coats of paint and set them aside to dry. We recommend propping them up against something (we used cardboard) so you can easily paint both sides.
Step 2
Download and print your egg designs and choose the sizes you want, then begin painting! Each design is double-sided, so remember to paint the front and back of the egg.
Step 3
Once you have your painted eggs, cut out your first egg (just one-half of the design) and stick it to your cardboard then cut around the outside. You can then cut out the other egg and stick it to the back of the cardboard, leaving you with a double-sided design.
Repeat this process until you have your desired amount of eggs. We used 9 eggs and a mixture of sizes.

Step 4
Use your hole punch on top of the egg and tie your string through. If adding a tassel, use a thumbtack to make a smaller hole in the bottom for your thread so you can attach it.
Step 5
Once you have completed this process for all of your eggs you can place your sticks (i.e. your tree) in the vase then hang your eggs on.
Step 6
Take a photo of your tree and upload it to your socials! Don’t forget to tag us!